
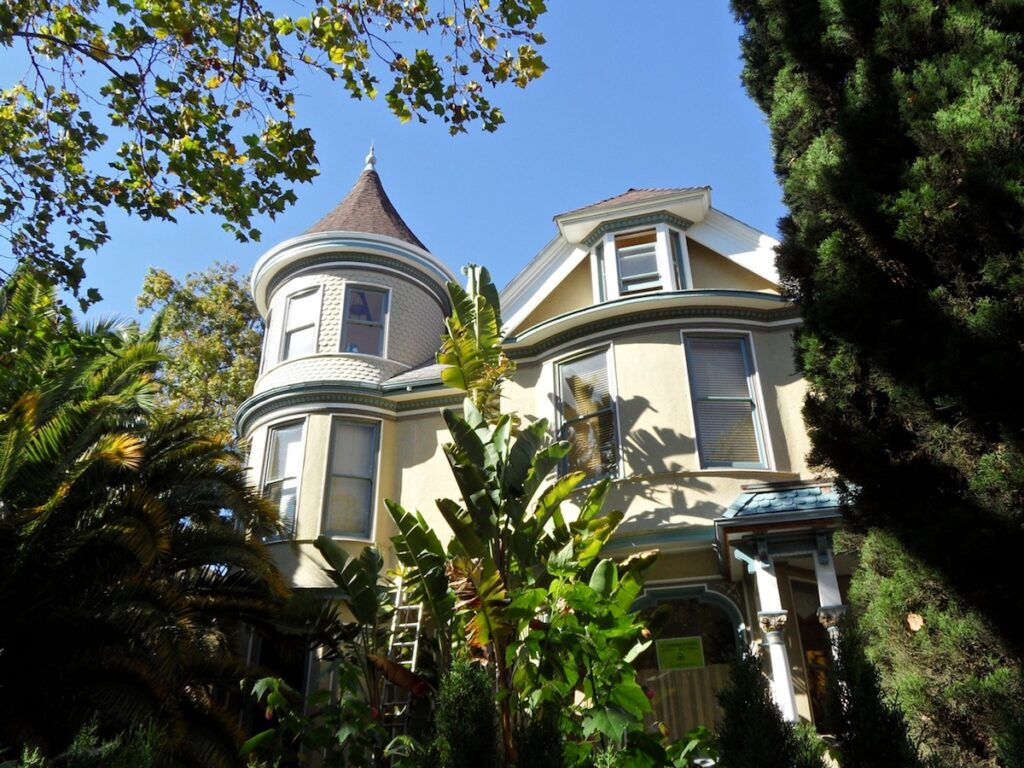
Reconstruction of a Tower
Story by Alan H. Teague
Award Recipient: Alan H. Teague, Owner; Sam & Matt Najdek, Ore-Cal CIonstruction; Alan Santes, The Windows Zone; Derek Pavlik Design
In March of 2009, I wrote to “This Old House” to see if they had any advice for restoring the tower on my 1895 Queen Anne home. The response was “Lots of money and a restoration specialist”. While not particularly helpful, it did drive home that I would need to be the one to figure out the project.
Over the next several months, I explained the project to three different contractor/designers. Each one came back with a bid which exceeded what they originally thought. Scaffolding seemed to be a big variable in cost for folks—but ten thousand? Really? None of these worked for me either in terms of budget nor comfort with the contractor.
I figured that I needed to have plans to show contractors so that they would understand that the project really is simple except for the height. This was where Luck stepped in to play. A friend at work was deep into figuring out how to more than double the square footage of their home. I leveraged their research into designers and settled on the one they had chosen. Derek Pavlik turned out to be a good choice and it wasn’t very long before I had plans submitted to the Alameda Planning Department. The project submittal included several archive photos of the original.
Over the next few weeks, Derek had “interesting” discussions with planning about whether this ‘Tower Reconstruction’ would fall into the height exception granted to ‘Towers, spires, and scenic lofts’. In the end, the project was given a green light. It wasn’t very surprising that the Planning Department was very interested and supportive of my restoration project. I ended 2009 with Planning Approval.
As my friends’ designer became my designer, so their contractor became mine. Sam of Ore-Cal Construction met with me to go over the plans and my ideas and hopes for the project and beyond. This meeting helped satisfy me that he understood my desires and love for the house. With this in mind, he worked up a bid that I could make work.
The original plans called for four windows and one door in the planned space. Luckily, the original door was still in the frame so that would be used simply as-is. The windows, on the other hand, required an artisan’s touch. I wanted the windows to match the rest of the house not only in visible style but also in tech- nology—counterweights, ropes, and pulleys. The talented man who restored all of the rest of the windows in the house was tasked with creating these pieces of the puzzle. The end result would be quite awesome.
Now came the time to apply for the actual Building Permit. The City is allowed 14-15 business days to review applications and they used every moment. In the end, the permit was granted without any additional fuss. Moving forward required decisions regarding the interior trim.
Custom trim is expensive! They have to make a special knife for each type and so it makes sense to cut all that you would ever want to have at the same time to save on costs. I searched the house and identified all of the places where the trim was missing or damaged. In the end, it came to about 30 rosettes and many many feet of door trim and baseboard caps. It would be cut out of poplar which is supposed to do very well on being bent a bit to conform to the curved walls.
The last two pieces of the puzzle were the finial to top off the witch’s cap and the material selection for the actual roof. I explored bronze, copper, ceramic, and wood for the finial. I found a place in Michigan to make a Lincoln Copper finial. While a copper roof would look incredible it would not fit into the budget so I ended up with matching shingles with the rest of the roof.
The deconstruction of the roof began in October 2010. The roof and structure came off quickly and we ended up with a fantastic view of the surrounding neighborhood. While enjoying the view and seeing Christ Church’s Steeple through the trees, an idea struck. In the dark room, there’s a round window sitting on a shelf—no clue as to its origin. It turns out there is a gap between the studs where it fits perfectly and gives an amazing view of the steeple. We changed the plans to include this additional window— with only a slight delay from planning to view the change.
We had over 6” of rain in December. Which given an average rainfall of 3” or so would explain a bit why the project moved forward very slowly. Christmas Day was very wet and the tarp weather-proofing failed spectacularly. Water was running down the hallway several feet and to my unhappy surprise out of the ceiling one floor below. Sam and Company worked late into the night cutting, hammering, sealing, taping, and generally fixing the problem. The tower laid fallow for a while longer with another disturbing leak into the downstairs caused by what may have been a gutter overflow cluttered with construction debris hidden beneath a tarp. Neither of these caused damage that couldn’t be repaired.
One Friday once the weather cleared, the finial arrived and they began shingling the roof of the tower. Once the roof was done, they begin putting up the fish-scale shingles on the sides. Each of these cedar shingles needed to be stained on both sides prior to being installed. There are 1,200 shingles so it was quite a job.
Well, sunny January passed with very little progress on the project. Construction was held up waiting for the gutters to be installed and the installer wasn’t available for a couple weeks. Once Jenks Gutters started the project, the rains came back. Very slow installation of the top gutter ensued. About 2 1/2 weeks later the top gutter was in place. Once he finished the top gutter, the plans changed. The lower gutter was delayed until the outside work was done. This way the gutter wouldn’t be damaged during the rest of the construction.
The outside details involves many different shaped pieces: a crown, a dentil, more crown, a flat section, a square line and then a final crown. Each one is hand- crafted out of reclaimed redwood and painstakingly installed. There is more trim to be added under the gutter. The most important bit is the part that establishes the drip-line.Theverticalsidingundertheguttergoesdowntoabout5/8”past where the frame cuts back in to the wall. This sets up a place for water to gather and ‘drip’ instead of seeping back along the flat into the wall and trim on the wall.
When the top of the tower was removed back around 1915, at least two of the original redwood joists were reused as roof supports. Or at least, that is my theory. I had two of them put aside during the demolition for use in the finished tower as the cross beams to support the chandelier/lights. After cleaning them up, I decided to use“old school”techniques. One part boiled linseed oil, two parts turpentine made up a very thin penetrating oil finish. Pure linseed oil turns redwood black, so the diluted version darkened the wood and more importantly brought out the grain. Once the third coat dried, I sealed the wood with shellac.
Making a long story of the interior short. Drywall went up (twice) and then lots of mud applied to make a smooth curve and cone. Window frames, trim, and aprons installed. Baseboards and floor refinished. Painting of the cone, walls and trim. The two beams installed and the lights hung. Done!
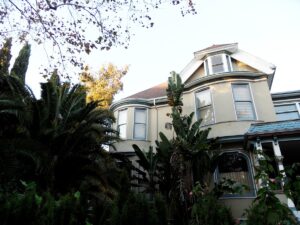
After ten months, I believe I made the right decision to rebuild the tower. The look of the house from the outside is quite different and much improved. The fish-scale siding blends in and it looks very much like it was always there. While it is hard to believe the removal of the tower was probably to modernize the look of the house, the reconstruction of it brings back the external elegance of this lone surviving mansion.